We regularly receive questions about the use of the Burghart Sniffin’ Sticks. On this page we explain step by step how the test works, as you can see it is an easy and user-friendly smell test. In the example we use the Screening 12 Test which consists of 12 everyday scents and can be used for a screening of the olfactory function. This test is a commonly used test within ENT and occupational health and safety services. After performing this screening test you can roughly say whether the test person has anosmia, hyposomy or normosmia. The test procedure of this test is the same with the blue identification 16 and purple identification 16 test, both of which consist of 16 scent pens. Do you still have questions? Let us know! We are happy to help you further.
Step 1: Prepare the test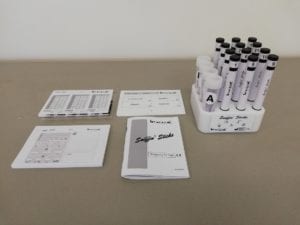
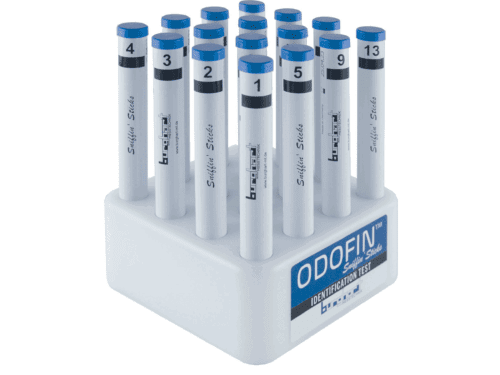
The test consists of the following components:
- 12 scent pens
- Holder
- 12 multiple choice cards
- Multilingual manual
- Answer block with answer template
- Evaluation block
- (optional flavor strips)
Make sure that you perform the test in a quiet and well ventilated room. Also we would advice to use odorless gloves while performing this test, if you don’t have gloves you can wash you hand without perfumed soap instead.
Step 2: Fill out registration form
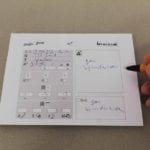
- Name / date of birth / gender
- Smoker or no smoker
- Profession
- Use of medication and other relevant medical background. It is worthwhile to assess a short anamnesis which includes questioning the patient for his medical history, taking of drugs, occupation and smoke habits.
- Registration date and time of test on evaluation form
Step 3: Inform test person about test procedure
-
smelling sniffin stick Your sense of smell will be tested with the help of Sniffin’ Sticks (scented pens)
- Each pen contains a different, everyday scent
- The pen will be held about 2 centimeters under your nose. Be careful not to touch the tip of the pen with you nose or hands.
- You will receive a sign on which you have to smell the pen intensively for 2-3 seconds
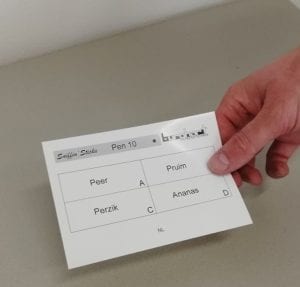
- You will receive a answering card with 4 answers from which you must choose the right odor
- You are forced to make a choice, if you do not know the odor then you still have to choose a odor (forced choice)
- The complete test will take approximately 10 minutes
Step 4: Hand over the answering card
- Wear odorless gloves
- Determine which pen you want to offer to the test person
- Take the corresponding multiple choice answering card and hand it over to the test person
 Step 5: Take and open the Sniffin’ Stick
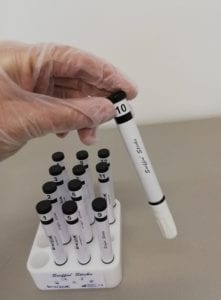
- Take the corresponding pen from the holder
- Remove the cap smoothly (possibly turn the cap slightly)
Step 6: Offer the pen to the test person
- Bring the opened odor pens with the tip at a distance of 2 cm centred in front of both nostrils.
- Give the test person a signal that he / she can start smelling. Use the same sentence for this, for example: Start smelling. Use this particular test all through the test so it is clear for the test person when he or she has to start smelling.
- You can also test the nostrils separately. In this test the patient must press 1 of the nostrils shut
- Remember that the test person does not touch the pen with hands or nose!
Step 7: The test person chooses an answer
-
Multiple choice card Screening 12 Test The test person must smell the pen for 2-3 seconds
- Put back the cap on the pen and place it back in the holder
- Ask the test person to name the odor using the answer card (choice of 4 scents)
- The test person must make a choice from the 4 answers
- Repeat this procedure for all 12 pens
- Use an interval of approximately 30 seconds between the presentation of the pens
Step 8: Registration of the answers
-
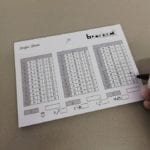
Answering pad Screening 12 Test Circle the answer given on the supplied answering sheet
- The first column is for testing the left nostril only
- The second column for testing the right nostril only
- The last column for testing both nostrils (bilateral)
Step 9: Count the correct answers
- After offering the markers and recording all 12 answers, take the plastic answering template
- You place this template over the answering block so you can easily check the right answers.
- Add up the number of correct answers and record this at the bottom of the block in the relevant column
Step 10: Fill out evaluation form
- Record the score (s) on the evaluation form
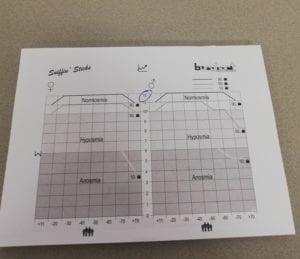
- Compare the score with the normative data in the graph on the back of the evaluation form
Step 10: Evaluation of the score
- The graph with normative data is broken down by gender
- The age is shown on the lower axis. The lines in the diagram indicate the relationship between the sense of smell and the age group.
- If the score is in the dark gray part, this indicates anosmia: 0 to 6 correct answers.
- Light gray part: hyposmia: 6 to 10 correct answers.
- White part: normosmia: 10 to 12 correct answers.
- The test has now come to an end, possibly discuss the results with the test person
Remarks Screening 12 Test
- The test can optionally be expanded with taste strips (sweet, sour, salty and bitter). About 10-15% of patients with a different sense of smell also have a taste impairment. That is why it is advisable to also test taste. The taste strips with the four basic flavors (sweet, sour, salty and bitter) make it possible to screen the taste.
- Every stick has an expiry date, do not use the markers after this date. The shelf life of the Screening 12 Test is approximately 1.5 years after production date, during this period you can use the markers with an unlimited number of people.
- The pens can be stored at room temperature (not in direct sunlight!)
- Never touch the tip of the pen!
- The test person must be sober from 15 minutes before the test. This means: no smoking, no drinking, no eating with the exception of water.
- More extensive smell tests are also available for further research


 Step 5: Take and open the Sniffin’ Stick